Monday, April 25, 2011

Play Ball!

Baseball season has officially begun and we couldn't have asked for a better opening day; 60 degrees and sunny. Yay! The opening ceremony was Saturday morning.

The team's first game started in the afternoon. Here's our coach supervising warm-ups.

Some of the boys waiting for their turn to bat.

Here's my boy at his first up-to-bat. He struck out. =o(

The action was endless even if it meant taking pictures of the opposite team.
A successful third base steal by the other team. Darn it!

Then he stole home from us too.

We have some good pitchers on our team. I caught this pitch from outside the fence behind the plate.

This is my favorite picture from Saturday. That's my boy up to bat hitting his first baseball of the season!  You can see the dust coming off the ball if you click on the picture to see it bigger. Way to go kid!

A shot of one of our other pitchers.

Yay! A run for the Rockies!

Safe! Another run scored.

It was a close game, but the Rockies ended up losing 5-4 in the last inning.  That's okay boys. We'll get em' next time!

Wednesday, April 13, 2011

Palletopia

I was doing a search online the other day for examples on how to build wooden crates. I came across some crates that were made from wooden pallets on Ana White's site. It got me to thinking...what else have people made with wooden pallets? So, I googled it. I was amazed at some of the things I found.

I'll save you the time of googling it yourself and run through some of what I found. Some I will probably be doing myself and some I won't.

I'll probably be doing something like this for my vegetables in the backyard.

Look! A potting bench! I'll probably do a version of this one too.

You can make furniture out of pallets.

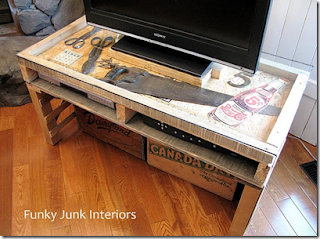
 Even if it's just for display like this one. So cute!
 Put wheels on a couple and make yourself a mobile daybed.
 Wonder if there's toilet paper inside this.
 Pretty cute.
 Wonder how much sanding went into this before they were able to work on it.

I don't know about you, but this may be a little too obvious.

Someone is very talented!
 Interesting...
Yard art?

 This is cool, but what does one do with a huge wood pallet sphere?

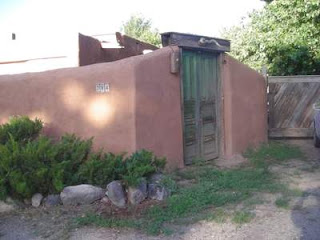
This couple used pallets as the bones for their stucco wall.

 Pretty cool huh?

My boys would LOVE this. All this mama sees is slivers!

Practical wood shed. Just keep the fireworks away from this baby. I bet it would light up in 1.2 seconds!

There's a riding lawn mower inside this shed.

These men turned these 206 wood pallets into...
 THIS! Can you believe it?
 And here's the inside. WOW!

So, lots of uses for FREE wood pallets besides firewood, even for those that have little experience with a hammer. I'll let you know how my projects turn out.

Remember your blessings!

Tuesday, April 12, 2011

Locker Dilemma

Sunday I made a locker for the boys to store their backpacks, jackets, shoes, and hats. I made it out of pine and cedar. As of now it's unfinished. I can't decide if I want to paint it or stain it. It's beautiful wood, but it's two different kinds. What do you think I should do?


Remember your blessings!
Amber

Monday, April 4, 2011

Mirror Mirror on the Wall

Yay for me! I finally got around to a project I've had sitting in the basement since sometime last year. It was such a nice day!

I picked up this mirror at a local thrift store for I think $25.  It's been awhile.  The good thing about nice weather is flip flops. The bad thing about nice weather in early spring? Pasty white winter legs!

There were hinges and decorative brass plates I had to remove.

The problem with removing these is they leave big holes in the wood.

I went to the hardware store and got some of this wood filler.

After sanding down the finish, then applying the wood filler, then waiting an agonizing hour and then sanding it again, it was ready to paint. Yay!  Oh, and please note I did NOT paint this while it was on the tailgate of my truck. I had to move it due to an unfortunate even that happened under the house having to do with a broken water pipe. Ugh!

After the middle section was done it was time to repeat the steps with the smaller side sections.

After everything was dry it was time to attach the hanging hardware. I was nervous about the nails being too small to hold the weight of the mirror, but after trying with a larger nail I knew I had nothing to worry about.  That wood is HARD! I decided to use these sawtooth hangers for the large section; one on each side of the mirror.

But since the side mirrors have a curved top I had to use hanging wires for them.

Here's the wall before the mirrors.

Just $10 worth of supplies, one afternoon of elbow grease, and a flooded basement later, we have this! The mirrors are bigger than what I had pictured, but what an improvement!


Remember your blessings!
Amber

This project linked to: